
Welcome to our straightforward guide on creating a textured floral painting using Gaffrey Art Material's acrylic paints. In this tutorial, Justin Gaffrey will demonstrate the practical use of our Heavy Texture and Acrylic Colors, alongside palette knives and paint piping techniques. This session is tailored to provide clear, step-by-step instructions, ensuring you can effectively utilize our products to achieve impressive, tangible results in your artwork. Let's begin this process, by practicing each part on your palette before completing a full painting.
Materials:
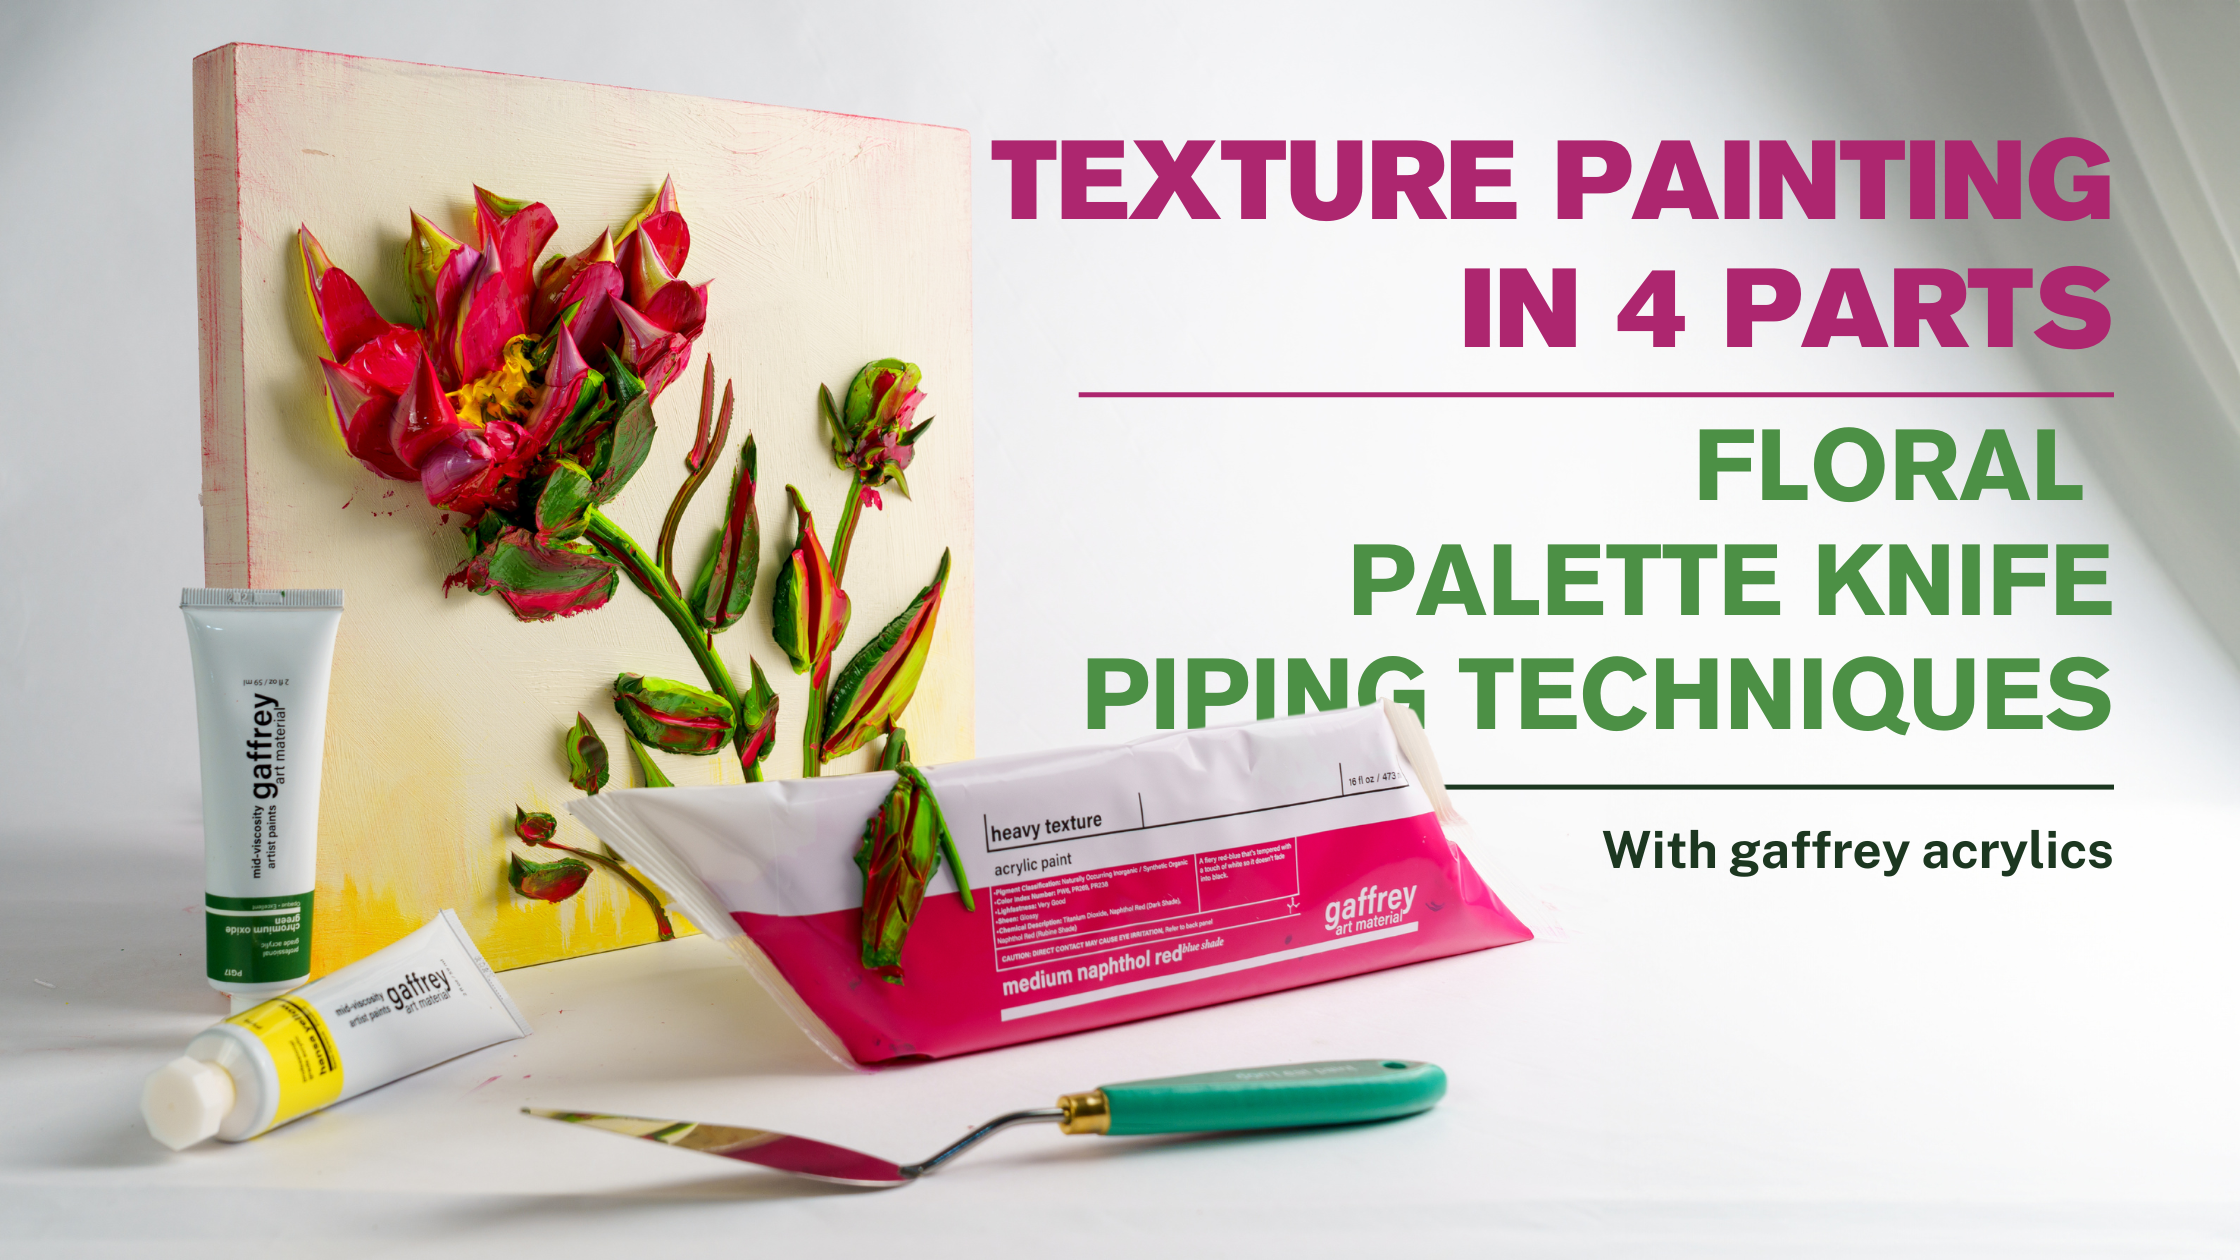
- 16 oz Naphthol Red Blue Shade Heavy Texture - $17
- 2 oz Kermit Green Acrylic Colors - $9
- 2 oz Chromium Green Oxide Acrylic Colors - $8
- 2 oz Hansa Yellow Acrylic Colors - $9
- 2 oz Titanium White Acrylic Colors - $7
- 16 inch Paint Piping Bags 50pk - $9
- 2022 Spade Palette Knife - $6.50
- Vintage White Base Coat (gesso/artist paint hybrid) - $19
- 12x12x1.5 inch Wood Panel - $13
Procedure:

Step 1: Preparing the Leaf and Stem Piping Bag
- Take a 16-inch paint piping bag and run Kermit Green Acrylic Color along one seam.
- Apply Chromium Green Oxide Acrylic Color along the opposite seam.
- Smear the colors inside the bag slightly, ensuring they stay on their respective sides.
- Open the bag and add a generous amount of Naphthol Red Blue Shade Heavy Texture into the center.
- Tamp the bag, making the Heavy texture slide down, mixing slightly with the greens, providing a glazed effect.
- Snip the tip of the bag to about a quarter inch with scissors. This bag is now ready for creating leaves and stems.

Step 2: Crafting the Flower Petal Piping Bag
- In a new piping bag, apply a strip of Kermit Green Acrylic Color on one seam—less than the previous bag.
- Apply Titanium White Acrylic Color on the opposite seam, creating a thin line.
- Add a generous amount of Naphthol Red Blue Shade Heavy Texture to the bag, ensuring no air bubbles remain.
- Snip the opening to about a half or 3/8 of an inch, based on your preference.
- Test the output on your palette, adjusting if necessary.

Step 3: Creating Petals and Leaves
- Pipe a dollop of the petal mixture onto your palette.
- Use the palette knife to flatten and shape each dollop into a petal, ensuring a variety of color with each stroke.
- Clean the knife between strokes to maintain crisp colors and lines.
- For leaves and stems, maintain a steady hand to ensure smooth, consistent lines.
- Pipe a dollop for leaves, then use the knife to lightly create the leaf shape and add veins.

Step 4: Drying and Finishing Touches
- Once you have successfully practiced the steps on your palette, you are ready to proceed with completing a full painting.
- Apply one thick layer of Vintage White Base Coat to your wood panel with thick and expressive brushstrokes.
- Repeat the steps from earlier to create a floral impasto painting.
- After completing your painting, plug in a fan to expedite the drying process.
- The painting should be dry to the touch within a few hours and ready to hang the next day.
Remember, the key to beautiful impasto work is consistency and flow. Keep your piping bags twisted and tight for precision. Practice makes perfect, so don't hesitate to use your palette for trial runs before committing to canvas. Enjoy the process and watch your sculptural floral creation come to life!